
Working at Miller Attics has taught me that connecting flex duct properly is a skill any homeowner can learn with the right guidance. Today, I’m sharing the exact process I use for duct installation projects, focusing purely on the practical steps you need to know. Let me walk you through how to connect flex duct together correctly.
Essential Tools and Materials You’ll Need
Before starting your ac duct installation, gather these items:
Tools: Sharp utility knife, heavy-duty scissors, tape measure, screwdriver or nut driver
Materials: Metal collar connectors (appropriate diameter), metal worm-gear clamps or heavy-duty zip ties, UL 181B-FX rated foil HVAC tape, mastic sealant, canvas or nylon support straps
Safety gear: Respirator or dust mask, gloves, long sleeves, eye protection, headlamp
Never use standard duct tape—it fails in attic temperatures. Only use foil tape rated for HVAC applications.
Step 1: Measuring and Cutting Your Flex Duct
Measure twice and cut once to avoid wasting material and ensure proper fit.
Flex duct should be stretched to 90-95% of its full extension when installed, not compressed like an accordion.
Measure the distance between connection points, then add 4-6 inches on each end for overlap onto collars. Mark your cut line clearly around the entire circumference. Using your utility knife, cut through the outer vapor barrier first, then the insulation layer, and finally the inner core. Work carefully for a clean, square cut.
Slightly compress the duct at your cutting location for easier handling and better blade control. After cutting, inspect the end—it should be reasonably square without ragged edges.
Step 2: Preparing the Duct Ends
Separate the three duct layers before attempting connection to ensure a secure, airtight seal.
This preparation step is critical for duct installation success.
Pull back the outer vapor barrier about 2-3 inches from the cut end, exposing the insulation layer. Make a small starting cut with scissors if needed. Next, pull back the insulation layer another 2-3 inches, exposing the inner core.
You should now have a “stepped” configuration: the inner core extends about 2 inches beyond the insulation, which extends about 2 inches beyond the vapor barrier. Clean any debris or loose fibers from the inner core surface where it will contact the collar.
Step 3: Installing the Metal Collar Connector
Slide your metal collar into the inner core until it reaches the insulation layer.
The collar serves as the structural backbone when learning how to connect flex duct to flex duct.
Insert the crimped or beaded end of the collar first, sliding it into the inner core of the prepared flex duct. Push the collar in until it reaches where you’ve pulled back the insulation layer. For connecting two duct sections together, insert both duct ends onto opposite sides of the collar, with each side receiving equal insertion depth.
Use collars at least 4 inches long, allowing 2 inches of insertion on each side. For larger diameter ducts, longer collars provide extra security.
Step 4: Securing the Inner Core
Wrap the inner core tightly around the collar and secure it with metal clamps spaced every few inches.
This mechanical connection provides structural integrity.
Position your first metal worm-gear clamp about 1 inch from the edge of the inner core where it overlaps the collar. Tighten the clamp until the inner core is firmly compressed against the collar—you should see slight compression but don’t overtighten. Place 2-3 clamps on each connection, spaced about 1-2 inches apart.
After securing, test the connection by trying to pull the duct off the collar. It should be firmly attached with no movement.
Step 5: Sealing with Mastic
Apply mastic sealant generously around the connection to create an airtight seal.
Mastic is essential for professional-quality ac duct installation.
Using a disposable brush or putty knife, spread mastic liberally over the entire area where the inner core meets the collar. Apply a thick, even coat about 1/8 inch thick. Pay special attention to the edge where the inner core terminates—this is a prime location for air leaks.
When connecting how to connect flex duct to flex duct, apply mastic to both ends of the collar connection. Mastic typically requires several hours to cure, but you can continue with the next steps while it sets.
Step 6: Securing the Insulation Layer
Pull the insulation layer forward over the sealed connection and secure it with another clamp.
The insulation provides thermal protection and reduces condensation.
Carefully pull the insulation layer forward until it covers the connection you’ve just sealed, overlapping onto the collar by about 1-2 inches. Secure with another metal clamp or heavy-duty zip tie. This connection doesn’t need to be as tight as the inner core connection—you’re primarily holding the insulation in place.
Try to fluff any compressed insulation back to its original thickness before securing. Compressed insulation loses effectiveness.

Step 7: Securing the Outer Vapor Barrier
Extend the outer vapor barrier over the insulation layer and secure it.
The vapor barrier prevents moisture infiltration.
Pull the outer vapor barrier forward so it completely covers the insulation layer connection, overlapping by at least 2 inches. Secure with a final metal clamp or zip tie where the vapor barrier meets the collar.
Smooth out any wrinkles or bunched areas after securing. A neat, smooth appearance indicates that each layer is properly positioned.
Step 8: Applying Foil Tape
Wrap UL-rated foil tape around the entire vapor barrier connection.
Foil tape is the finishing touch for duct installation.
Starting at any point, apply the tape in a spiral pattern, wrapping around the duct with about 50% overlap on each wrap. Firmly press the tape as you go. Continue wrapping until you’ve covered the entire connection area—typically 4-6 inches of tape width along the duct length.
Fold over about half an inch of tape at the end to create a pull-tab for future maintenance. Press all edges firmly to ensure complete adhesion.
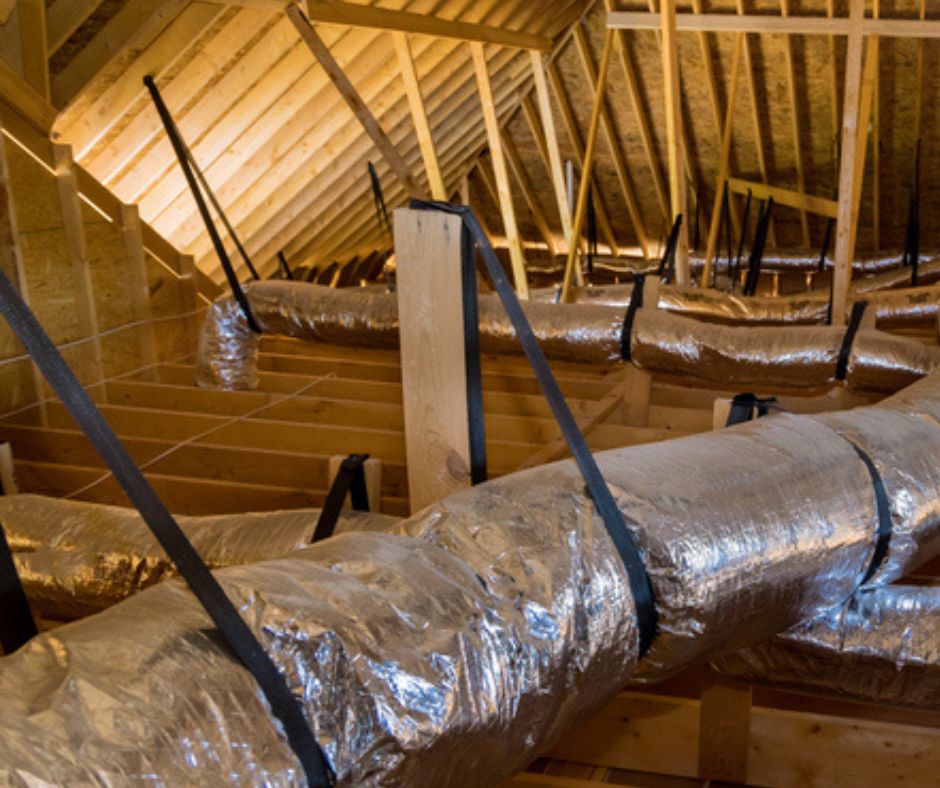
Step 9: Stretching and Supporting the Duct
Extend the connected flex duct to near its full length and install support straps every 4 feet maximum.
Proper support prevents sagging and maintains airflow efficiency.
Gently pull the duct to eliminate compression and ensure smooth airflow. Install support straps at intervals no greater than 4 feet using 1.5-inch nylon or canvas straps that won’t cut into the vapor barrier.
Place supports within 12-18 inches on either side of your connection to prevent stress concentration at the joint. Avoid sharp bends—maintain as gentle a radius as possible, aiming for bends no sharper than 45 degrees.
Step 10: Testing for Air Leaks
Turn on your HVAC system and carefully check for air leaks. Testing verifies your duct installation was successful.
Once mastic has cured (typically 4-24 hours), restore power and turn on your HVAC system. Carefully feel around your connection with your hand—air leaks feel like a light breeze escaping. Pay particular attention to edges where each layer terminates on the collar.
For a more definitive test, use a smoke pencil or incense stick near the connection and watch for disturbances in the smoke pattern. If you discover leaks, shut down the system and address them immediately with additional mastic or foil tape.
Understanding Flex Duct Basics
Flexible ductwork consists of three layers: an inner core (plastic or metalized polyester), middle insulation (typically fiberglass), and an outer vapor barrier. When connecting flex duct, all three layers must be properly secured and sealed.
Most residential ac duct installation projects use insulated flex duct ranging from 6 to 10 inches in diameter. The connection principles remain consistent across sizes, though materials and techniques slightly adjust based on diameter.
Common Mistakes to Avoid
Through years of inspecting duct installation work, I’ve seen these recurring errors:
Inadequate mechanical fastening – Using only one zip tie or clamp where multiple fasteners are needed, or not tightening fasteners adequately. Connections can blow apart under air pressure.
Skipping mastic sealant – Relying solely on foil tape provides only surface protection. Without mastic filling gaps at the inner core, even tape-covered connections leak significantly.
Using incorrect materials – Standard duct tape fails in attic temperatures, sometimes within months. Thin plastic zip ties degrade quickly. Always use HVAC-rated materials.
Installing compressed duct – Compressed or bunched flex duct reduces airflow by 40-50% compared to properly stretched installations. Flex duct must be nearly fully extended to perform correctly.
Inadequate support spacing – Straps spaced more than 4 feet apart cause sagging, which reduces efficiency, stresses connections, and creates condensation accumulation points.
Safety Considerations
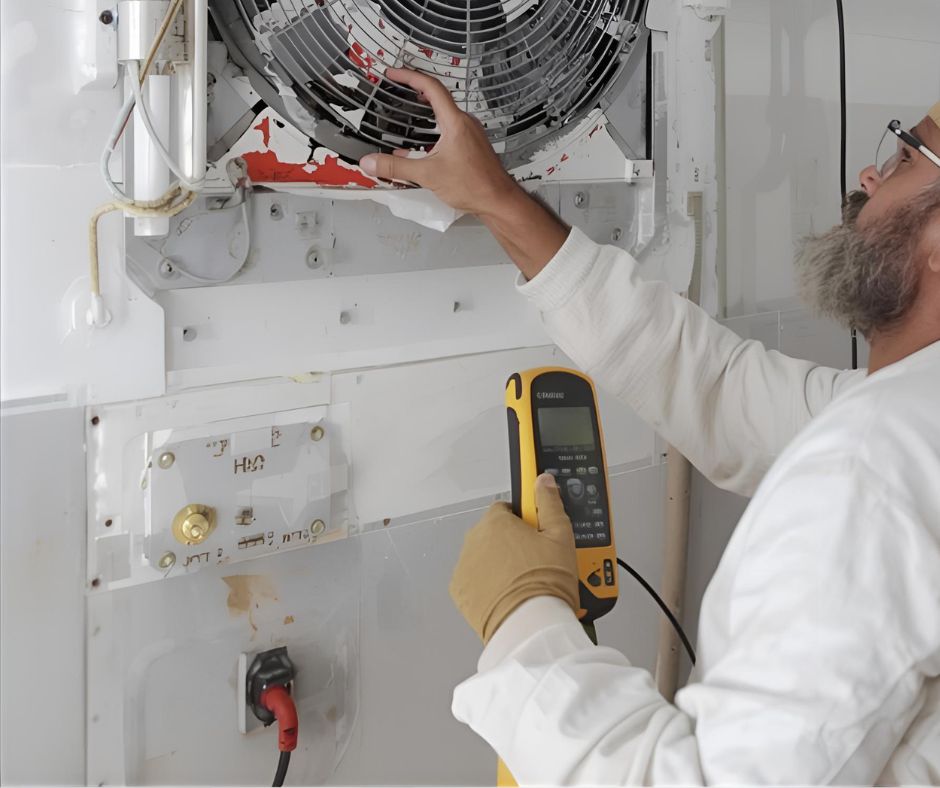
Working with HVAC systems requires attention to safety. Always shut off your system completely—at the thermostat and at the breaker—before beginning work.
Attics are hot, poorly lit, and filled with irritating insulation. Always wear a respirator or quality dust mask, long sleeves, gloves, and eye protection. Use a headlamp for adequate visibility.
Only step on ceiling joists or sturdy attic flooring—never on drywall ceiling, which cannot support your weight. Be aware of electrical wiring and junction boxes in your work area to avoid accidental damage.
Maintaining Your Connections
Quality duct installation requires ongoing maintenance. Inspect your connections annually, particularly before peak heating and cooling seasons. Look for loosening tape, moisture stains, sagging duct, or compressed insulation.
Listen for new whistling, hissing, or rushing air sounds during system operation—these often indicate developing leaks. Monitor utility bills for unexpected increases, which may signal duct problems.
Make periodic visual inspections part of your routine. A quick check every 6-12 months reveals issues before they become expensive problems.
When Professional Help Makes Sense
Some situations genuinely require professional expertise. Complex duct installation involving multiple branches, difficult attic access, or integration with existing metal ductwork often exceeds typical homeowner capabilities.
Modifications to primary trunk lines or major system components should generally be left to professionals, as errors can affect your entire home’s comfort and efficiency. Working in extremely tight or dangerous spaces presents safety risks that outweigh cost savings.
If you attempt a connection and can’t eliminate air leaks despite multiple tries, professional help prevents wasting more time and materials.
Final Thoughts
The techniques I’ve shared represent best practices for how to connect flex duct together that ensure lasting, efficient connections. Quality duct connections directly impact your home’s comfort and energy efficiency.
Key principles to remember: use HVAC-rated materials, create mechanical connections before sealing, apply both mastic and foil tape, stretch duct to near-full extension, support at proper intervals, and always test for leaks. Take your time with each connection—the difference between rushed and careful work is often the difference between 30% air loss and nearly full efficiency.