At Miller Attics, we’ve installed hundreds of crawl space vapor barriers across California, and we hear the same questions every single day. Here’s the thing: there’s no one-size-fits-all answer to most of these questions. What works for a home in San Diego might be completely wrong for a house in Sacramento. Let me walk you through the most important questions homeowners ask us, with straight answers based on what we actually see in the field.
Do I Really Need a Vapor Barrier in California’s Dry Climate?
Yes, even in California’s dry climate, most crawl spaces benefit from a vapor barrier.
I know this surprises people. They say, “But we barely get rain!” Here’s what they’re missing: moisture doesn’t just come from rain. It comes up from the ground beneath your house. We’ve measured humidity levels over 80% in crawl spaces during California’s “dry” summer months, simply from ground moisture evaporating upward.
That said, homes in extremely arid parts of Southern California with very low water tables might not need one. But honestly? That’s maybe 5% of the homes we inspect. The other 95% have enough ground moisture to cause problems over time. Wood rot, mold, and musty odors don’t care that you live in a “dry” state. They only care about the moisture level right there under your house.
Should My Crawl Space Be Vented or Unvented?
The answer depends on whether you’re installing a proper crawl space vapor barrier system.
Old building practices said to ventilate everything. Open those vents, let air flow through, and moisture will leave. That made sense in theory. In practice, we’ve found it often makes things worse.
Here’s why: in humid weather, outside air is loaded with moisture. When that humid air enters your cool crawl space, the relative humidity shoots up. We’ve measured crawl spaces where outside humidity was 60%, but inside the vented crawl space it jumped to 75% or higher. That’s mold territory.
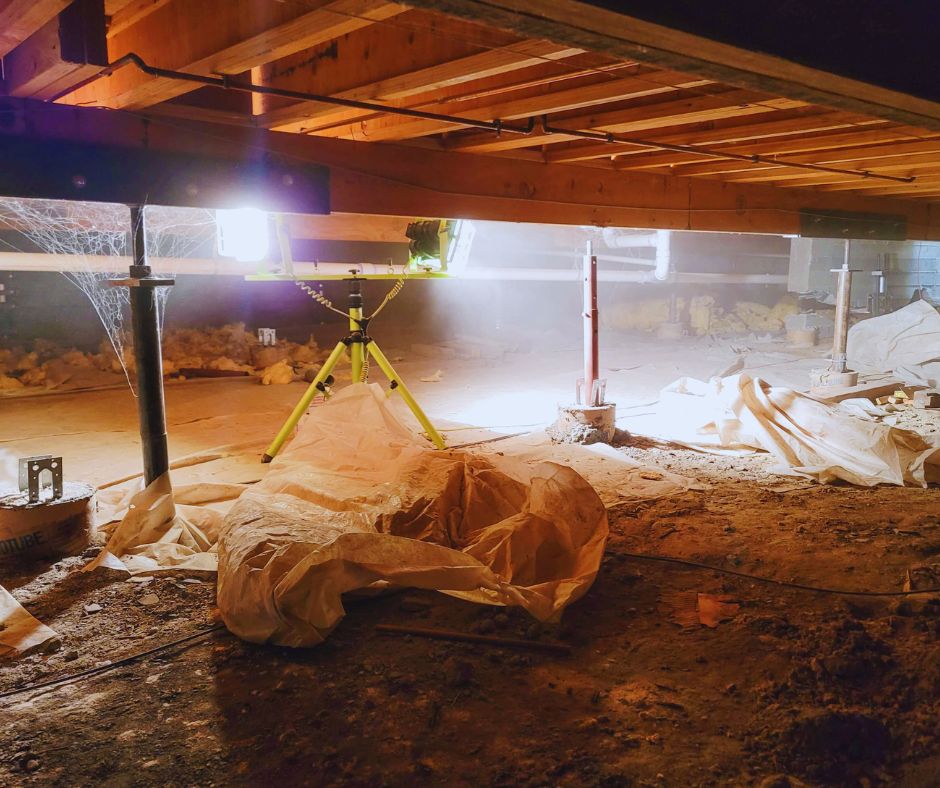
Modern building science says to seal the crawl space, install a vapor barrier for crawl space, and control the environment. California’s 2022 Residential Code allows both approaches, but if you go unvented, you must follow specific requirements: continuous Class I vapor retarder on the ground, sealed seams, and either mechanical ventilation or conditioned air supply.
Which is right for your home? It depends on your existing HVAC system, whether you have pipes or ducts in the crawl space that need freeze protection, and your local microclimate. This is exactly where you need professional assessment, not Google.

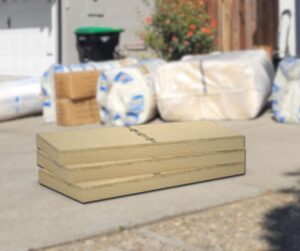
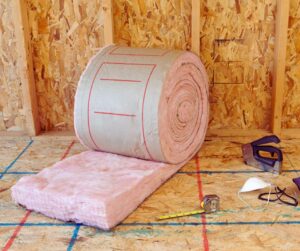
What Thickness Vapor Barrier Do I Need: 6 mil, 10 mil, or 20 mil?
Start with 12 mil as your baseline, and adjust from there based on your specific situation.
The building code allows 6 mil as minimum, but let me be blunt: 6 mil tears easily. We see it punctured by rocks, roots, and even just from people crawling across it during inspections.
Here’s how we think about thickness: If nobody will ever enter your crawl space except for emergencies, 10-12 mil works fine. If you store items down there or access utilities regularly, jump to 20 mil. Yes, the cost to install vapor barrier in crawl space goes up with thicker material, but you’re looking at maybe $200-400 more for a typical home. Compare that to replacing a failed 6 mil barrier in five years, including labor.
The 20 mil products also usually have better puncture resistance and UV stability if your crawl space has any light exposure. For tight spaces with sharp rocks or building debris on the ground, we won’t even quote 6 mil anymore. It’s setting the homeowner up for failure.
Do I Need a Dehumidifier Even With a Vapor Barrier?
A crawl space vapor barrier alone might not control humidity completely, especially in sealed crawl spaces.
The vapor barrier stops moisture from the ground, which is huge. But it doesn’t address moisture from outside air, plumbing leaks, or HVAC condensation.
Think of it this way: the vapor barrier is like weatherstripping on your door. Essential, but it doesn’t replace your air conditioner. In sealed, unvented crawl spaces, we almost always recommend adding humidity control. That could be a dedicated crawl space dehumidifier (typically $1,200-2,000 installed) or conditioning the space with your home’s HVAC system.
How do you know which you need? We measure the humidity levels over several days. If your sealed crawl space stays under 60% relative humidity year-round without mechanical help, you’re fine. That’s rare though. Most California homes need something, even if it’s just running the dehumidifier during our humid seasons.
The cost for crawl space vapor barrier plus dehumidifier might seem high initially, but it’s way cheaper than replacing rotted floor joists. We just finished a job where the homeowner ignored humidity issues for seven years. The repair bill was $18,000. A dehumidifier costs $1,500.
Should I Insulate the Ceiling or the Walls?
Insulate the crawl space walls, not the ceiling, if you’re sealing and conditioning the space.
This is a huge shift from old construction methods, and it confuses people. Traditional practice was to insulate between your floor joists (the crawl space ceiling) and leave the crawl space walls bare.
The modern approach treats your crawl space as part of your home’s conditioned envelope. We insulate the foundation walls, seal the vents, install the crawl space vapor barrier on the ground, and maintain the space at a reasonable temperature. This protects your plumbing, provides better floor comfort, and usually improves energy efficiency.
But there are exceptions. If you have a vented crawl space that you’re keeping vented, ceiling insulation still makes sense. If you live in a very mild climate zone and have no pipes to protect, ceiling insulation might be adequate. If you’re planning to encapsulate but can’t do it yet, keeping the ceiling insulation as a temporary measure is fine.
The decision affects your cost to install vapor barrier in crawl space overall, because wall insulation plus vapor barrier costs more upfront than just slapping a barrier on the ground. But the long-term performance is usually worth it.
What Do I Do About Standing Water?
Stop everything and fix the water problem first—a vapor barrier won’t solve standing water issues.
I can’t count how many times someone calls us saying, “I installed a vapor barrier but there’s still water in my crawl space!” Well, yes. Vapor barriers block moisture vapor, not liquid water.
Standing water means you have drainage problems. Maybe your gutters dump water next to the foundation. Maybe the ground slopes toward your house. Maybe you have a high water table and need a sump pump system. We need to identify the source and fix it before installing any barrier.
Common fixes include: regrading the soil around your foundation, installing or repairing gutters and downspouts, adding French drains around the perimeter, or installing an interior drainage system with a sump pump. Only after the crawl space stays dry through a full rainy season do we install the vapor barrier.
Some homeowners see condensation under their vapor barrier and panic. Small amounts of moisture under the barrier after heavy rain, especially in high water table areas, can be normal. The barrier is doing its job—keeping that moisture from entering your crawl space air. But pools of standing water? That’s a drainage emergency.
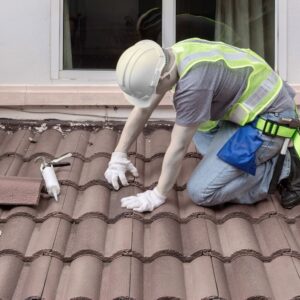
Can I Install This Myself or Do I Need a Professional?
You can DIY a basic crawl space vapor barrier installation
if you’re physically able and the space is accessible, but professional installation ensures proper sealing and addresses issues you might miss. The material cost for DIY is $100-400 for a typical 1,500 square foot crawl space. Labor makes professional installation run $1,000-3,000 for the same space.
So why pay the extra money? First, crawl spaces are miserable to work in. It’s dark, tight, often full of spiders and mouse droppings. Second, proper installation matters enormously. We see DIY jobs all the time where seams weren’t overlapped enough, the barrier wasn’t brought up the walls, or the tape failed within a year.
Third—and this is the big one—professionals identify problems you don’t know to look for. Is that fluffy insulation containing asbestos? Is there active mold that needs remediation first? Are those puddles from a plumbing leak or foundation crack? Last month we started a “simple vapor barrier” job and discovered a cracked sewer line. If the homeowner had just covered it up, they’d have faced a catastrophic failure within months.
If you do go DIY, at minimum have a professional inspect first and teach you the proper installation method. Don’t just watch a YouTube video and dive in.
How Do I Know If I Need Simple Vapor Barrier or Full Encapsulation?
A basic vapor barrier for crawl space covers the ground only, while encapsulation seals the ground, walls, and all vents to create a controlled environment. Basic vapor barriers run $500-2,500 for most homes. Full encapsulation runs $5,000-15,000 or more.
When is basic vapor barrier enough? If your crawl space is dry, you have minimal humidity issues, you’re keeping it vented, and you just need to meet building code or control minor ground moisture, a basic barrier works fine.
When do you need full encapsulation? If you have recurring humidity problems, musty odors coming up into your house, mold issues, cold floors in winter, or high energy bills. Encapsulation creates a mini-basement: sealed, dry, and stable. It’s more expensive upfront but solves problems that a simple barrier can’t touch.
Think of it as the difference between an umbrella and a raincoat. The umbrella (basic barrier) keeps rain off your head. The raincoat (encapsulation) keeps you completely dry. Which you need depends on how wet you’re getting.
What About Code Requirements and Permits?
California Residential Code 2022 requires Class I vapor retarders in unvented crawl spaces, with joints overlapped 6 inches and sealed. That’s the baseline. Local jurisdictions can add requirements. Some require 12-inch overlaps for radon mitigation areas. Some require specific attachment methods to foundation walls. Some require permits for vapor barrier installation; others don’t unless you’re doing other work.
The code also specifies that vapor barriers must extend at least 6 inches up the stem wall and be attached and sealed. For unvented spaces, you need mechanical ventilation or conditioned air supply. For vented spaces, you need 1 square foot of vent area per 150 square feet of crawl space with an uncovered earth floor.
Here’s the practical reality: code compliance matters for resale, insurance claims, and avoiding problems down the line. Even if your local building department doesn’t require a permit for a simple crawl space vapor barrier, following code guidelines protects you. We always install to code minimum or better, regardless of whether someone’s checking.
How Long Will It Last and When Should I Replace It?
A properly installed crawl space vapor barrier lasts 20-25 years in good conditions, but expect to inspect it every 5 years for damage. That lifespan assumes quality materials, proper installation, no physical damage, and stable conditions. In reality, we see lots of variables.
Six-mil barriers in high-traffic areas might fail in 5-7 years. Twenty-mil barriers with sealed seams in protected environments can last 30+ years. Barriers in crawl spaces with standing water problems fail quickly regardless of thickness. Barriers with pest issues (rodents chewing through) need replacement sooner.
Signs you need replacement: visible tears or holes, water pooling on top of the barrier, musty smells returning to your home, increased humidity readings, or sagging and pulling away from walls. Minor punctures can be patched with proper vapor barrier tape, but widespread damage means replacement time.
The cost to install vapor barrier in crawl space for replacement is similar to new installation—you’re paying mostly for labor to access the space and install properly. This is why we emphasize quality installation the first time.
The Bottom Line
Every crawl space vapor barrier project is different. Your home’s age, your local water table, your climate zone, your budget, and your future plans all factor into the right solution. What worked for your neighbor might be completely wrong for you, even if your houses look identical from the street.
At Miller Attics, we start every project with a thorough inspection and moisture assessment. We measure, we look for the source of problems, and we design solutions for your specific situation. Sometimes that’s a simple 12-mil barrier on the ground. Sometimes it’s full encapsulation with dehumidification. Often it’s somewhere in between.
The questions in this article don’t have simple yes-or-no answers because houses are complex systems. But that’s exactly why professional expertise matters. We’ve seen what works and what fails. We know California’s climate zones, building codes, and common problems. And we stand behind our work.
If you’re dealing with crawl space issues, don’t guess. Get a professional assessment. The couple hundred dollars for an inspection might save you thousands in repairs—or at minimum, give you peace of mind that you’re making the right choice for your home.